


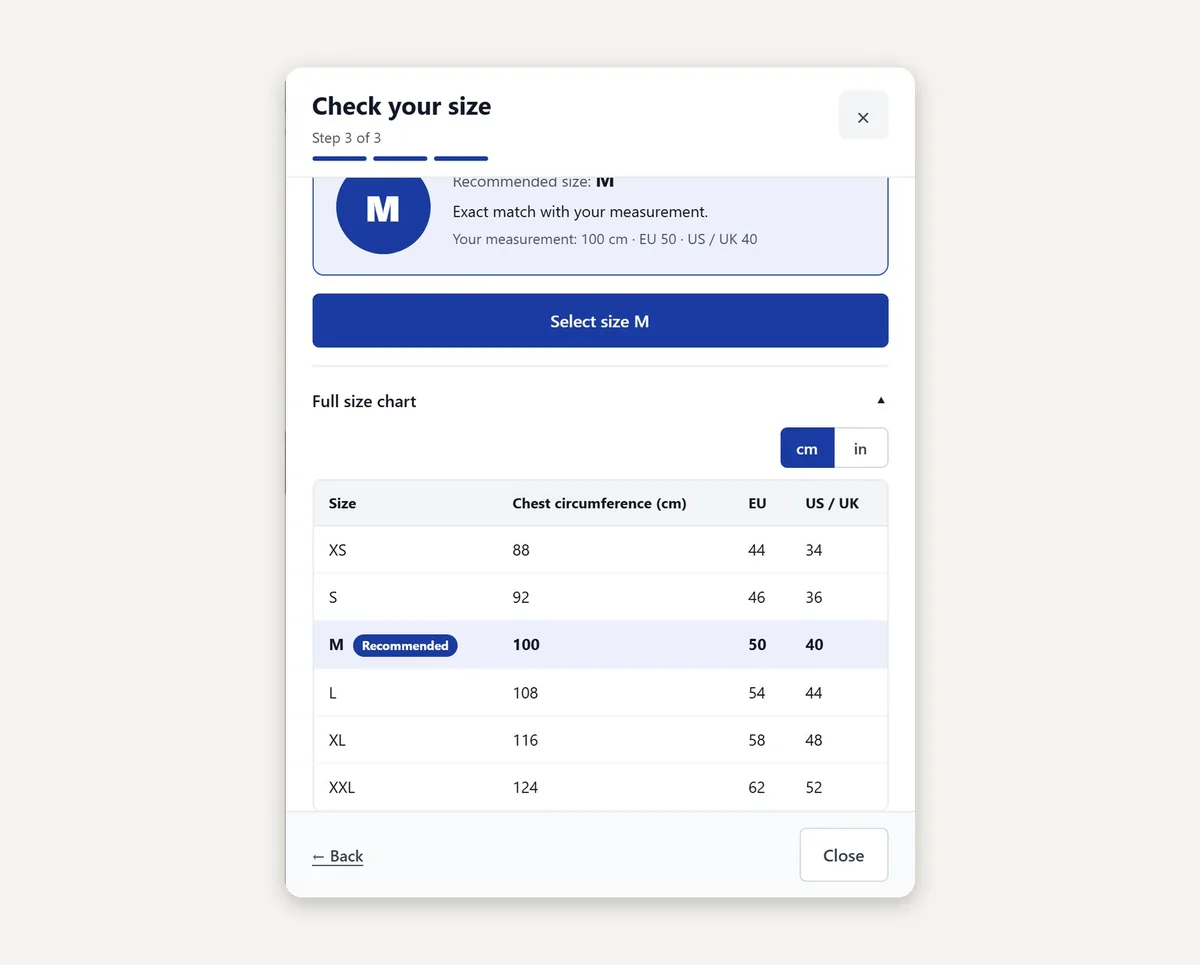
The size chart is the heart of the size guide. The wizard uses it to work out the recommended size, and the customer can also open it in full. Each chart has one measurement (for example chest for jackets), rows with a size label and the measurement in centimetres, and, if you like, extra columns such as EU and US / UK.
Before you start
- the manufacturer's size chart (Excel, PDF or a web page) with one measurement in cm for each size,
- a decision on who the chart is for: men, women, kids or unisex.
1. Add a chart
Content › Size guide › Size charts
Click Add chart. If you do not have a chart yet, click Load example (men's jacket) and adapt the example.
In the General section enter a Title. It is an internal name (for example "Alpina jackets men"); customers do not see it.
Choose the Gender (men, women, kids or unisex). If a product has charts for men and women, the customer chooses the group in step 1 of the wizard.
Choose the Measurement: chest, waist, hips, neck, head or hand circumference, inside leg, foot length or height. It sets the question and the picture in step 2.
Under Store view leave all views or choose only those where the chart applies. Leave the Priority at its default; it only matters when several charts would apply to the same product (see assigning charts).
2. Add columns
In the Table section the Size label and Measurement (cm) columns are always there. Extra columns (for example EU, US / UK, sleeve length) are added once for the whole chart, not in every row: click New column and enter the Column name. A chart can have up to 8 extra columns.
3. Enter the rows
Enter the rows by hand or paste them from Excel. Each row has a size label (S, M, 52, 37/38 ...) and the measurement in cm; a decimal comma or point both work. A chart can have up to 200 rows. When you save, the rows are sorted by the measurement.
Pasting from Excel
In Excel select the cells of the chart, with or without the header row, and copy them. The first column is the size, the second the measurement in cm, then the extra columns.
In the editor click Paste from Excel and paste the cells into the field. The module shows what it detected ("Detected: 6 rows, 4 columns") and marks rows with an error.
Choose Add at the end or Replace the existing rows and confirm the import.
CSV import and export
Import CSV reads a file separated by semicolons or commas, encoded in UTF-8 or Windows-1250. The file can be at most 200 KB. The easiest way to see the format is to export an existing chart with Export CSV: the columns are Size, Measurement (cm), the extra columns and Selector label. You can edit the exported file and import it again.
Selector label
The "Select size" button selects the size in the product's size selector when the row label matches the option label (upper and lower case and spaces do not matter). If the size is written differently in the selector, for example "56 (EU)" instead of "56", enter that label in the Selector label (optional) column. If the product does not offer the size, the customer sees the result without the button.
4. Texts for the customer
In the Texts section you enter, per store view, the Window title, Measurement question, How to measure, the column names and the Note below the chart. An empty field uses the built-in, translated text, so there are no translation files to edit.
5. Preview and save
The Preview section shows the chart as customers will see it, on a phone or a computer, in cm or inches and per store view. Click Save. The editor does not save a chart with rows that have an error (a duplicate size label or a measurement that is not a number) and tells you which ones. Customers see the chart only once you give it an assignment.
Frequently asked questions
Can one chart ask for two measurements, for example chest and waist? No, a chart has one measurement. For trousers create a separate chart with the waist.
What if the customer's measurement is outside the chart? The customer gets the nearest end of the chart and a note that the measurement is outside it.
Next: Size guide: assigning charts.